How to Clean Rusty Tools and Restore Them Like New
Finding a box of rusty tools in the garage, at an estate sale, or on a job site doesn't mean those tools are destined for the scrap pile. In most cases, even heavily corroded hand tools and power tools can be brought back to working condition with the right approach and a bit of elbow grease.
The truth is, many older tools were built with better steel and heavier construction than what you'll find on store shelves today. A rusty Stanley plane from the 1950s or a set of pre-2000 Craftsman wrenches is often worth saving—not just for the cost savings, but because these tools can outperform their modern counterparts once they're cleaned up.
Whether you're a contractor looking to extend the life of your equipment, a DIYer who scored a deal on some neglected tools, or someone preparing restored tools for resale, this guide covers everything you need to know about removing rust and protecting your investment.
Why Bother Restoring Rusty Tools?
Before diving into restoration methods, it's worth understanding why old tools are often worth the effort.
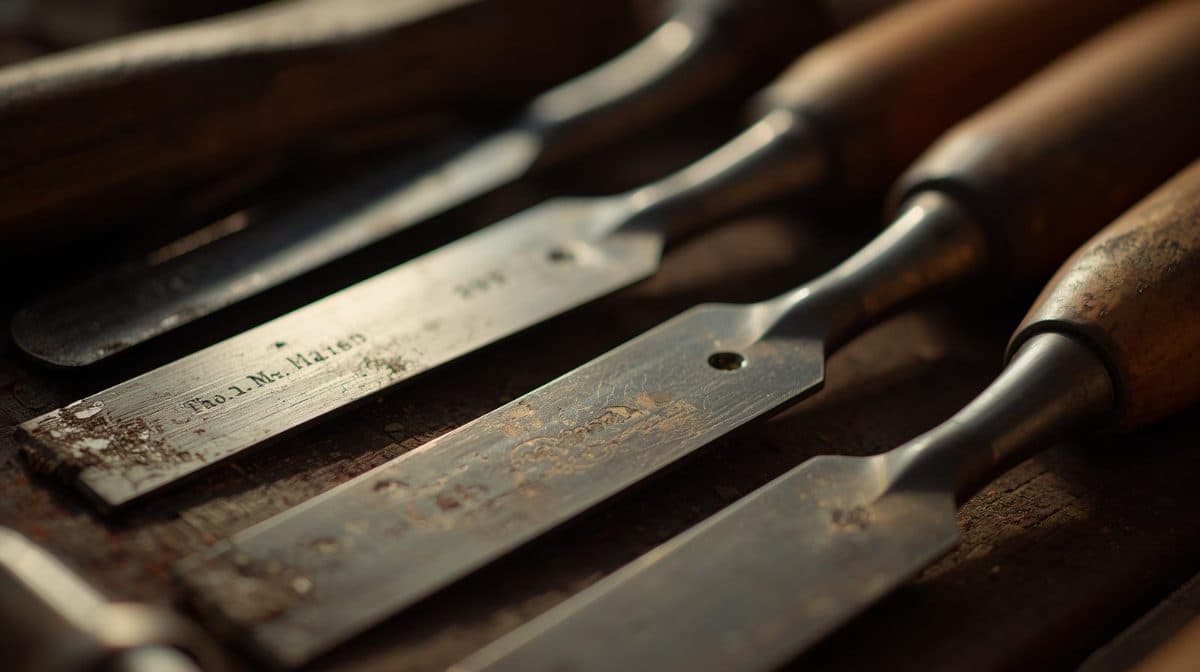
Vintage hand tools—especially those made before the shift to overseas manufacturing—were typically forged from higher-quality steel. The metal holds an edge longer, resists wear better, and was built to be repaired rather than replaced. Heavy-duty construction meant tools like hand planes, wrenches, and chisels could handle decades of professional use.
There's also the practical side: a quality restored tool costs a fraction of buying new, and you're keeping functional equipment out of landfills. For sellers, clean tools command significantly higher prices than rusty ones. A crusty old hand plane might sell for $15 as-is, but the same tool restored could fetch $50-75 to the right buyer.
Assessing the Damage: Is It Worth Restoring?
Not every rusty tool is worth saving. Before investing time in restoration, do a quick assessment.
Surface rust appears as orange or reddish discoloration that hasn't eaten into the metal. This is the easiest to remove and rarely affects tool function. You'll see this on tools that were stored in humid conditions but weren't exposed to water or chemicals.
Deep pitting shows up as rough, crater-like spots where rust has actually eaten away metal. Light pitting is usually acceptable on most tools, but severe pitting on cutting edges (plane blades, chisels, saw teeth) means the tool may never hold a proper edge again.
Structural damage includes cracks, bends, or breaks in the metal. A cracked wrench or bent screwdriver shaft is generally not worth restoring—the structural integrity is compromised.
The 30-second test: Scrape a rusty spot with your fingernail or a plastic scraper. If the rust flakes off easily and you see solid metal underneath, the tool is a good candidate. If your scraper catches on pits and rough spots, proceed with caution.
Rust Removal Methods: From Simple to Advanced
Different levels of rust call for different approaches. Start with the simplest method that matches your situation and escalate if needed.
The Vinegar Soak Method
Best for light to moderate rust on hand tools, this method is cheap, safe, and works surprisingly well.
What you'll need:
- White vinegar (the cheap stuff works fine)
- Plastic container large enough to submerge your tools
- Steel wool or brass brush
- Baking soda
- Clean rags
The process:
- Submerge the rusty tools completely in undiluted white vinegar
- Let them soak for 24-48 hours (check progress at 24 hours)
- Remove and scrub with steel wool or a brass brush
- Rinse thoroughly with water
- Neutralize any remaining acid by wiping with a baking soda and water solution
- Dry completely and apply protective oil immediately
The acetic acid in vinegar dissolves rust without damaging the underlying steel. This method works well for wrenches, pliers, screwdrivers, and other hand tools. Avoid soaking tools with wooden handles—remove the handles first if possible.
Wire Brush and Penetrating Oil
This is the go-to method for moderate rust when you need results faster than a vinegar soak.
What you'll need:
- Penetrating oil (PB Blaster, Kroil, or WD-40 Specialist Rust Release)
- Wire brushes (brass for softer metals, steel for heavy rust)
- Wire wheel attachment for a drill (optional but faster)
- Safety glasses (mandatory)
- Work gloves
The process:
- Apply penetrating oil liberally to all rusted surfaces
- Let it sit for 15-30 minutes to break the rust's bond with the metal
- Scrub with a wire brush, working in the direction of any grain or machining marks
- Reapply oil and repeat for stubborn spots
- For large jobs, a wire wheel on a drill or angle grinder speeds things up significantly
- Wipe clean and apply protective coating
Safety note: Wire wheels throw debris at high speed. Safety glasses aren't optional here—a wire bristle in the eye is a trip to the emergency room.
This method is particularly effective for tools with textured surfaces, threads, or hard-to-reach areas where soaking alone won't cut it.
Sandpaper Progression Method
For flat surfaces like plane soles, chisel backs, and saw plates, sandpaper provides controlled rust removal with a smooth finish.
What you'll need:
- Sandpaper in progressive grits: 80, 120, 220, 400
- Flat surface (glass plate, granite tile, or machine table)
- Light oil or water for wet sanding
- Patience
The process:
- Start with 80 or 120 grit depending on rust severity
- Work the tool across the sandpaper in consistent strokes
- Progress through finer grits, spending adequate time at each stage
- Wet sanding with light oil produces better results and less dust
- Finish at 400 grit for a smooth, rust-resistant surface
For plane soles and chisel backs, this method not only removes rust but also flattens the surface—improving tool performance beyond its original condition.
A Note on Electrolysis
You may have heard about electrolysis rust removal—a method that uses electrical current to remove rust from metal. While it can be effective for heavily corroded tools, it involves working with electrical equipment, chemical solutions, and produces hydrogen gas during the process.
We're not covering the how-to here because there are real safety considerations involved. If you're interested in exploring electrolysis, do your research from multiple sources, understand the risks, and follow all safety precautions carefully. It's not a beginner method, and proper ventilation and equipment are essential.
For most rust removal jobs, the vinegar, wire brush, and sandpaper methods covered above will handle everything you need.
Chemical Rust Removers
When time is critical, commercial rust removers offer fast results.
Popular options:
- Evapo-Rust: Biodegradable, reusable, and effective. Soak for 30 minutes to overnight.
- Naval Jelly: Phosphoric acid-based, works fast but requires careful handling and proper PPE.
- Ospho: Converts rust to iron phosphate, often used as a primer prep.
These products work well but cost more than DIY methods. Follow the manufacturer's instructions and safety guidelines. They're best reserved for situations where you need quick turnaround or are dealing with tools that can't be easily submerged.
Cleaning Power Tools: Special Considerations
Power tools require extra care because of their electrical components and moving parts.
Before you start: Always disconnect power tools from electricity. Remove batteries from cordless tools. This isn't just safety advice—you don't want to accidentally trigger the tool while your hands are near moving parts.
For surface rust on housings and metal parts:
- Use compressed air to blow out dust and debris first
- Apply a degreaser to remove built-up grime
- Use fine steel wool or a Scotch-Brite pad with light oil
- Avoid getting any liquids near motors, switches, or electronics
- Wipe everything dry and apply a light coat of protective oil
For rust on tables and beds (table saws, jointers, drill presses):
- Remove any accessories and clear the surface
- Apply paste wax remover or mineral spirits to cut through old wax and grime
- Use the sandpaper progression method on the flat surface
- Finish with paste wax (not oil) for a slick, rust-resistant surface
While you're at it: Inspect power cords for damage, check brushes if accessible, and clean any ventilation openings. A restoration is a good opportunity to address deferred maintenance.
Protecting Your Tools After Cleaning
Removing rust is only half the battle. Without proper protection, those clean tools will be rusty again within weeks.
Immediate Protection
As soon as you've finished cleaning, apply protection before the metal is exposed to humid air for too long.
Light machine oil (3-in-1 oil, camellia oil, or even automatic transmission fluid) provides excellent short-term protection for hand tools. Wipe a thin coat over all metal surfaces and buff off the excess.
Paste wax (Johnson's Paste Wax, Minwax, or specialty tool wax) creates a longer-lasting barrier. It's the preferred protection for flat surfaces like table saw tops, plane soles, and jointer beds. Apply a thin coat, let it haze, and buff to a shine.
Long-Term Prevention
The best rust prevention is environmental control.
Humidity is the enemy. If your workshop or garage regularly exceeds 50% relative humidity, you're fighting a losing battle. A dehumidifier makes a significant difference.
Tool storage matters:
- Store tools in climate-controlled spaces when possible
- Use vapor corrosion inhibitor (VCI) products—paper, chips, or emitters—in tool chests and drawers
- Silica gel packets absorb moisture in enclosed spaces
- Tool chest drawer liners with rust inhibitors provide ongoing protection
Daily habits: Wipe down tools after use, especially if you've been sweating on them. The salts in perspiration accelerate rust formation. A quick wipe with an oily rag takes seconds and prevents problems.
Handle Restoration
Don't neglect the handles—they affect both comfort and safety.
Wood Handles
Old wooden handles on hammers, chisels, files, and screwdrivers can be brought back to life:
- Sand with 120-grit to remove old finish and smooth rough spots
- Progress to 220-grit for a smooth surface
- Apply boiled linseed oil or tung oil
- Let it soak in, wipe off excess, and repeat 2-3 times
- Allow to cure fully before heavy use
For handles that are cracked, splintered, or have loose heads, replacement is the safer choice. Quality replacement handles are inexpensive and widely available.
Rubber and Plastic Grips
Modern tool grips can usually be cleaned with mild soap and water. For sticky or deteriorated rubber, try wiping with isopropyl alcohol. If grips are hardened, cracked, or peeling, replacement is the best option—deteriorated grips affect control and can cause blisters.
Why Vintage Tools Are Worth the Hunt
Beyond the satisfaction of restoration, there are practical reasons to seek out older tools.
Better materials: Pre-1970s American-made tools typically used higher-carbon steel that holds edges longer and resists wear. Stanley, Disston, Millers Falls, and early Craftsman tools were built to professional standards.
Heavier construction: Weight isn't always a disadvantage. A heavier hand plane tracks better. A heavier wrench provides more leverage. Modern tools are often lightened to reduce shipping costs, not to improve performance.
Simpler design: Older tools have fewer plastic parts, simpler mechanisms, and were designed to be repaired. When something wears out, you can usually fix it rather than replacing the entire tool.
Specific examples worth finding:
- Stanley Bailey bench planes (#4, #5, #7)
- Disston hand saws (pre-1960s)
- Pre-2000 Craftsman hand tools (USA-made)
- Vintage Snap-on and Proto wrenches
- Starrett measuring tools
- Old growth wooden handles (denser, more durable)
Preparing Restored Tools for Resale
If you're restoring tools to sell, presentation matters.
Clean thoroughly: Buyers expect restored tools to look restored. Remove all rust, clean handles, and apply fresh protection.
Photograph well: Good lighting, clean backgrounds, and multiple angles help buyers see what they're getting. Include close-ups of any remaining wear or imperfections—honest photos build trust.
Describe accurately: Note the brand, model if known, condition, and what restoration work was done. Mention any remaining issues—buyers appreciate honesty and are more likely to leave positive feedback.
Price appropriately: Check completed sales on eBay and marketplace listings for comparable tools. Restored vintage tools in good condition command premium prices from buyers who know what they're getting.
Platforms like Tool Pile make it easy to connect with buyers who appreciate quality equipment. Listing is free, and you'll reach contractors and serious DIYers who understand the value of a properly restored tool.
Final Thoughts
Most rusty tools sitting in garages, basements, and estate sales across the country can be saved. The methods aren't complicated, the materials are inexpensive, and the results are genuinely satisfying.
Start with the simplest method that fits your rust situation. Vinegar and a wire brush handle most jobs. For heavily corroded tools, chemical removers or professional restoration may be the way to go.
Once your tools are clean, keep them that way. Proper storage and a quick wipe-down after use prevents rust from returning. Your restored tools—whether vintage finds or your everyday equipment—will perform better and last longer with basic ongoing care.
Have restored tools ready to sell? List them on Tool Pile—it's free, and you'll reach buyers who appreciate quality equipment.
Frank has 13+ years in AML and financial crimes compliance. He built Tool Pile specifically to bring fraud prevention principles to contractor equipment marketplaces — anonymous listings, and scam detection baked in from day one.
-optimized.jpg&w=3840&q=75)